模拟Spring实现一个简易的IOC容器
一、介绍
在模拟实现 IOC容器之前,我们必须要掌握反射相关的知识,毕竟 IOC容器采用的是反射进行的查找创建。
反射可以看我以前的这篇文章
Java注解的介绍和反射使用 | 半月无霜 (banmoon.top)
二、步骤
在 spring的包中,有这么一个接口 ApplicationContext.java,他是一个容器接口,一切的开始都是由它开始,spring中定义了各种场景下使用的实现类,其中常见有以下几种实现类
-
AnnotationConfigApplicationContext:通过注解配置初始化容器
-
ClassPathXmlApplicationContext:通过 xml配置文件初始化容器
-
AnnotationConfigServletWebApplicationContext:注解配置加载 web环境的容器
既然我们要自己写一个容器,我们也需要一个这样的容器类,接口不接口的无所谓,我们可以不考虑结构,只考虑效果。故我们只需要一个容器类就好了。
除了容器外,我们还需要一个注解,分别作用于类上,作为标识此类要进行初始化被容器管理
那么步骤如下
-
先创建一个容器类,这个容器类中有初始化 bean,获取 bean的方法
-
初始化 bean时,需要传入一个包路径,自动扫描这个包路径下的类
-
如果类上面要是有 @bean注解,我们就进行实例化类,并加入到容器中
三、实现
我们先把注解写了
1
2
3
4
5
6
7
8
9
10
11
12
13
14
| package com.banmoon.test.mockioc.annotation;
import java.lang.annotation.ElementType;
import java.lang.annotation.Retention;
import java.lang.annotation.RetentionPolicy;
import java.lang.annotation.Target;
@Target(ElementType.TYPE)
@Retention(RetentionPolicy.RUNTIME)
public @interface Bean {
String value() default "";
}
|
然后,我们可以开始写容器了,代码一步到位,看构造器初始化方法,查看是如何加载到类,并将其实例化的。
以及容器中有个 Map<String, Object> singleObjects = new HashMap<>();,这才是用来存储实例化后的对象的
1
2
3
4
5
6
7
8
9
10
11
12
13
14
15
16
17
18
19
20
21
22
23
24
25
26
27
28
29
30
31
32
33
34
35
36
37
38
39
40
41
42
43
44
45
46
47
48
49
50
51
52
53
54
55
56
57
58
59
60
61
62
63
64
65
66
67
68
69
70
71
72
73
74
75
76
77
78
79
80
81
82
83
84
85
86
87
88
89
90
91
92
93
94
95
96
97
98
99
100
101
102
103
104
105
106
| package com.banmoon.test.mockioc.core;
import cn.hutool.core.util.ArrayUtil;
import cn.hutool.core.util.StrUtil;
import com.banmoon.test.mockioc.annotation.Bean;
import java.io.File;
import java.lang.reflect.Constructor;
import java.lang.reflect.InvocationTargetException;
import java.net.URL;
import java.net.URLDecoder;
import java.util.HashMap;
import java.util.Map;
import java.util.Objects;
public class MyApplicationContext {
private static final Map<String, Object> singleObjects = new HashMap<>();
private static String currentAbsPath = null;
public MyApplicationContext(String packagePath) throws Exception {
String basePackage = StrUtil.replace(packagePath, ".", "\\");
URL url = Thread.currentThread().getContextClassLoader().getResource(basePackage);
if (Objects.nonNull(url)) {
String filePath = URLDecoder.decode(url.getFile(), "utf-8");
currentAbsPath = filePath.substring(0, filePath.length() - basePackage.length());
scanBean(new File(filePath));
}
}
private void scanBean(File file) throws ClassNotFoundException, NoSuchMethodException, InvocationTargetException, InstantiationException, IllegalAccessException {
if (file.isDirectory()) {
File[] children = file.listFiles();
if (ArrayUtil.isEmpty(children)) {
return;
}
for (File child : children) {
if (child.isDirectory()) {
scanBean(child);
} else {
String pathWithClass = child.getAbsolutePath().substring(currentAbsPath.length() - 1);
if (pathWithClass.endsWith(".class")) {
String classPath = StrUtil.replace(pathWithClass, "\\", ".")
.replace(".class", "");
Class<?> clazz = Class.forName(classPath);
Bean annotation = clazz.getAnnotation(Bean.class);
if (!clazz.isInterface() && Objects.nonNull(annotation)) {
Constructor<?> constructor = clazz.getConstructor();
Object obj = constructor.newInstance();
String beanName = generateBeanName(annotation, clazz);
singleObjects.put(beanName, obj);
}
}
}
}
}
}
@SuppressWarnings("all")
public <T> T getBean(String beanName, Class<T> clazz) {
Object o = singleObjects.get(beanName);
if (!clazz.isInstance(o)) {
throw new UnsupportedOperationException("获取的类型错误");
}
return (T) o;
}
private String generateBeanName(Bean annotation, Class<?> clazz) {
String value = annotation.value();
if (StrUtil.isBlank(value)) {
Class<?>[] interfaces = clazz.getInterfaces();
if (ArrayUtil.isNotEmpty(interfaces)) {
value = StrUtil.lowerFirst(interfaces[0].getSimpleName());
} else {
value = StrUtil.lowerFirst(clazz.getSimpleName());
}
}
return value;
}
}
|
四、测试
写一个 service、一个 dao,以及对应的实现类
1
2
3
4
5
| package com.banmoon.test.mockioc.service;
public interface TestService {
}
|
1
2
3
4
5
6
7
8
9
10
11
| package com.banmoon.test.mockioc.service.impl;
import com.banmoon.test.mockioc.annotation.Bean;
import com.banmoon.test.mockioc.annotation.Di;
import com.banmoon.test.mockioc.dao.TestDao;
import com.banmoon.test.mockioc.service.TestService;
@Bean
public class TestServiceImpl implements TestService {
}
|
1
2
3
4
5
| package com.banmoon.test.mockioc.dao;
public interface TestDao {
}
|
1
2
3
4
5
6
7
8
9
| package com.banmoon.test.mockioc.dao.impl;
import com.banmoon.test.mockioc.annotation.Bean;
import com.banmoon.test.mockioc.dao.TestDao;
@Bean
public class TestDaoImpl implements TestDao {
}
|
再编写我们的主程序,来初始化这个容器
1
2
3
4
5
6
7
8
9
10
11
12
13
14
15
16
17
| package com.banmoon.test.mockioc;
import com.banmoon.test.mockioc.core.MyApplicationContext;
import com.banmoon.test.mockioc.dao.TestDao;
import com.banmoon.test.mockioc.service.TestService;
public class Test {
public static void main(String[] args) throws Exception {
MyApplicationContext context = new MyApplicationContext("com.banmoon.test.mockioc");
TestService testService = context.getBean("testService", TestService.class);
System.out.println(testService);
TestDao testDao = context.getBean("testDao", TestDao.class);
System.out.println(testDao);
}
}
|
运行结果如下
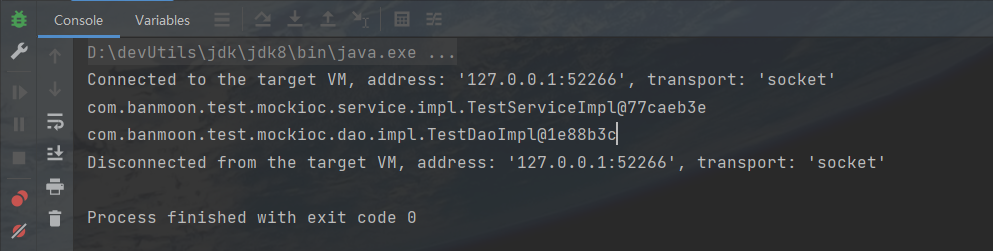
如此,一个简易的 IOC容器就已经搭建完成了
五、最后
想象很美好,实际问题会很多,在此只展示基本的原理。
如果真的这么简单的话,spring也就不会这么庞大了,555!!!
上面这段代码存在不少的问题,后续总结一下 spring中是如何解决这些个问题的吧。
我是半月,你我一同共勉!!!